Modules Explained
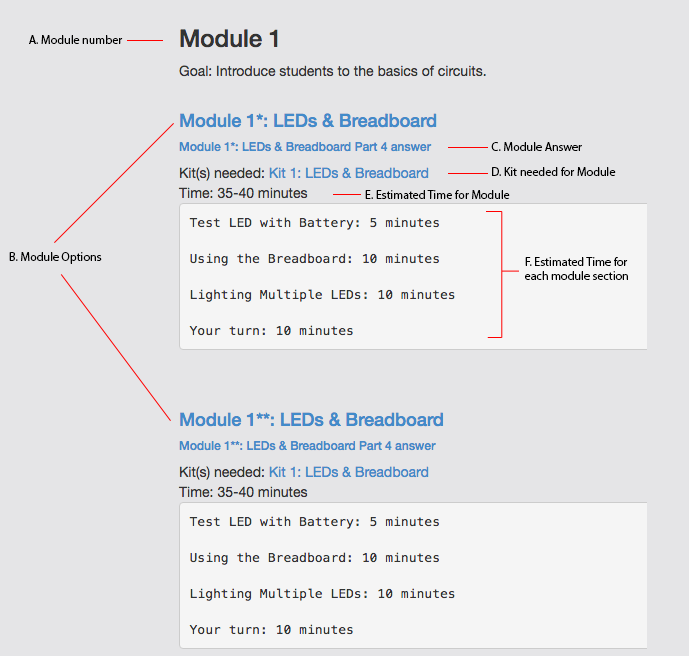
A.   Module number: There are 8 modules available. Later modules will assume that you know material from past modules.

B.   Module Options: Some module numbers have multiple options to pick from. These module options have a certain number
     of * next to the name. These * represent difficulty where one (*) represents simple, two (**) represents moderate
     difficulty and three (***) represents a challenge.

C.   Module Answer: Modules can have do it yourself activities where students are encouraged to take what they learn and solve
     a new problem. Here is where the correct answer is available.

D.   Kits needed for Module: Some Modules require a kit or more in order to complete. Here you can click on the link that will show
     you what is needed for this module.

E.   Estimated Time for Module: This is an estimated time needed for each module. However each students may work faster or slower then
     this estimated average time.

F.   Estimated Time for each module section: This is an estimated time needed for each module section. Here we can take a closer look
     at what students may need more time in doing.
Assignments Explained

A.   Assignment number: There are 7 assignments available. Assignments will assume that you know material from past modules.

B.   Assignment Options: Some assignment numbers have multiple options to pick from. These assignment options have a certain number
     of * next to the name. These * represent difficulty where one (*) represents simple, two (**) represents moderate
     difficulty and three (***) represents a challenge.

C.   Kits needed for Assignment: Some Assignments require a kit or more in order to complete. Here you can click on the link that will show
     you what is needed for this assignment.

D.   Estimated Time for Assignment: This is an estimated time needed for each assignment. However each students may work faster or slower then
     this estimated average time.

E.   Estimated Time for each assignment section: This is an estimated time needed for each assignment section. Here we can take a closer look
     at what students may need more time in doing.
Kits Explained
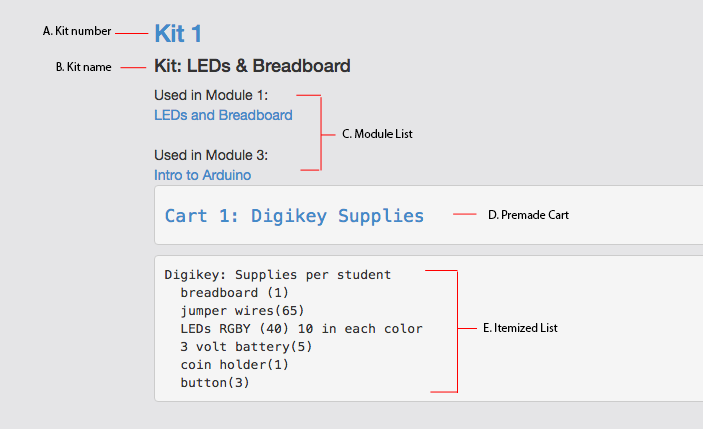
A.   Kit number: Links to the Kit 1 page that explains the materials in the kit in more detail. There are 5 Kits available. One kit can be
     used by multiple Modules and/ or Assignments.

B.   Kit name: Title of kit.

C.   Module List: List of what Modules use this kit for course work and Assignments. Links go to corresponding Module pages.

D.   Premade Cart: Link to premade cart containing all supplies needed to create kit.

E.   Itemized List: List of materials that are apart of the kit and what came be found in the premade cart. Next to the name of the product is a
     number in (). This number represents the amount of each material.
