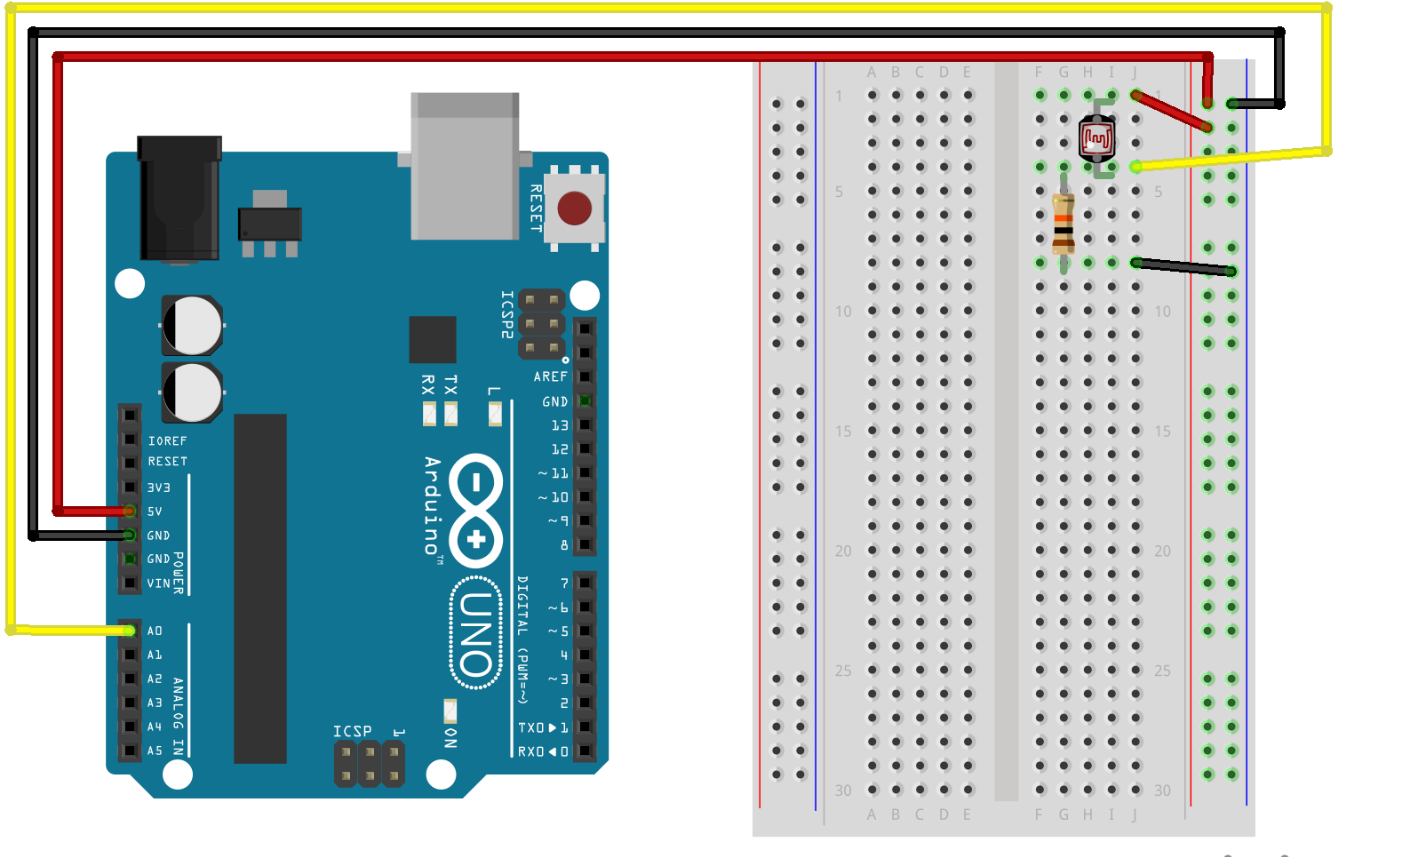
Photocell (Light Sensor)

Simple Arduino example to print out ambient light values using a photoresistor.
Components
1 x photoresistor
1 x 10k ohm resistor
1 x Arduino Uno
1 x breadboard
jumper wires
Setup

Arduino sketch
Inspect Serial monitor (9600) for light values.
/*
Adapted from
http://playground.arduino.cc/Learning/PhotoResistor
Simple test of the functionality of the photo resistor

Connect the photoresistor one leg to pin 0, and pin to +5V
Connect a resistor (around 10k is a good value, higher
values gives higher readings) from pin 0 to GND.

----------------------------------------------------

           PhotoR     10K
 +5     o---/\/\/--.--/\/\/---o GND
                   |
 Pin A0 o-----------

----------------------------------------------------
*/

int lightPin = A0;  //define a pin for Photo resistor

void setup()
{
    Serial.begin(9600);  //Begin serial communcation
    pinMode( lightPin, INPUT );
}

void loop()
{
    Serial.println(analogRead(lightPin)); //Write the value of the photoresistor to the serial monitor.
    delay(10); //short delay for faster response to light.
}

