Module 7: Exploring Other Sensors
Goal of this Module:To explore new sensors and learn how they workModule 7: Exploring Other Sensors Document Download
Module: Exploring Other Sensors
SquareWear Kit:
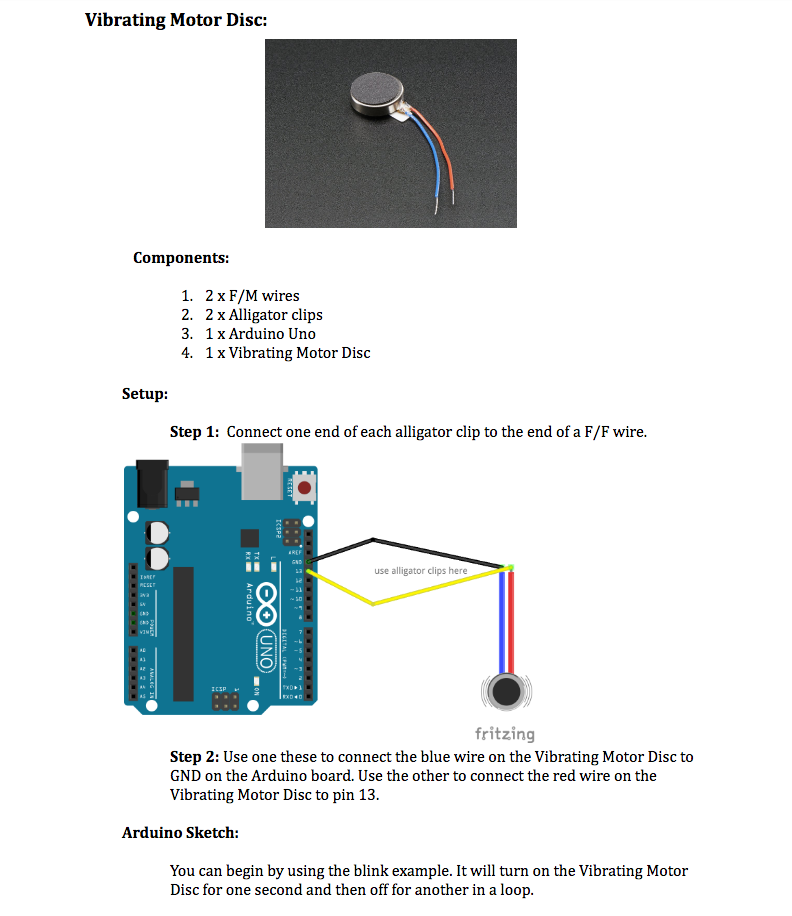
GoalsVibrating Motor
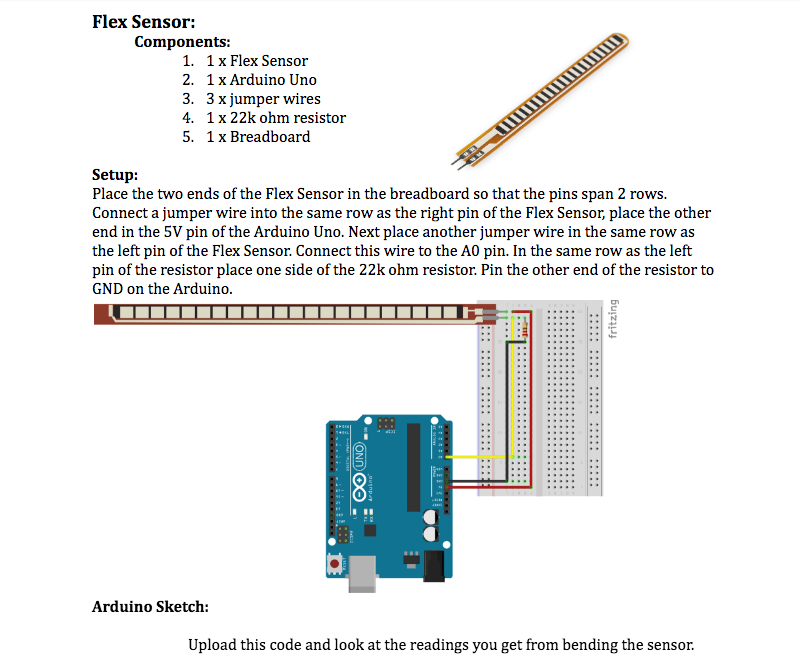
/* Blink Turns on an vibrating mini motor disc on for one second, then off for one second, repeatedly. This example code is in the public domain. */ // Pin 13 has an mini motor disc connected on most Arduino boards. // give it a name: int buzzPin = 13; // the setup routine runs once when you press reset: void setup() { // initialize the digital pin as an output. pinMode(buzzPin, OUTPUT); } // the loop routine runs over and over again forever: void loop() { digitalWrite(buzzPin, HIGH); // turn the LED on (HIGH is the voltage level) delay(1000); // wait for a second digitalWrite(buzzPin, LOW); // turn the LED off by making the voltage LOW delay(1000); // wait for a second }Distance Sensor
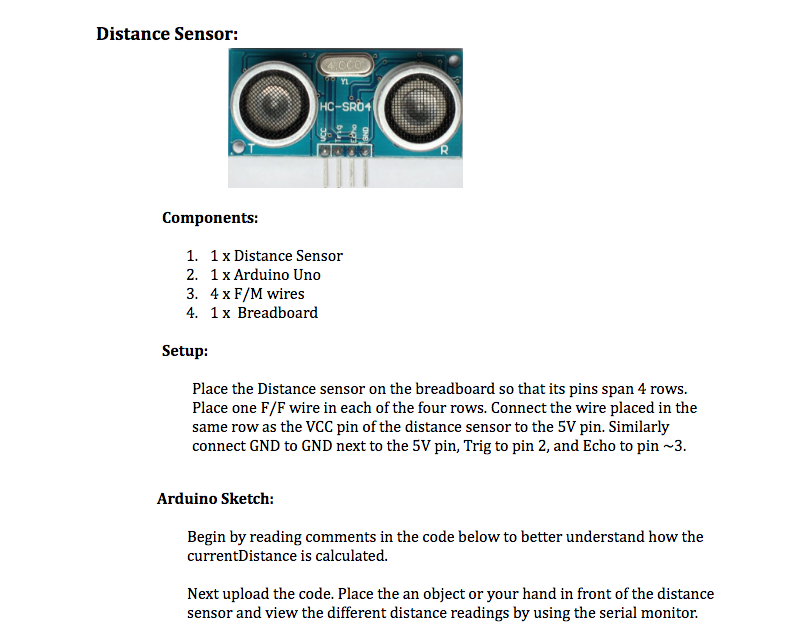
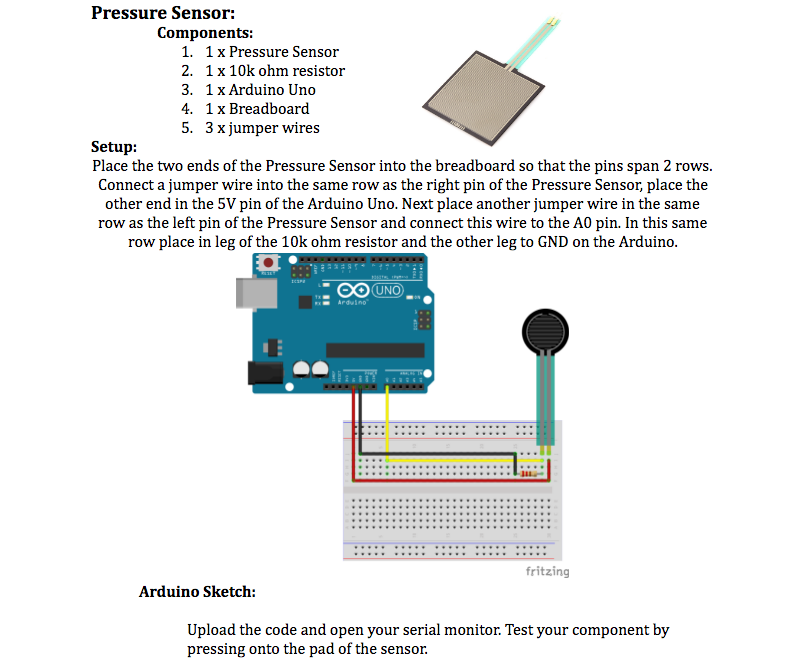
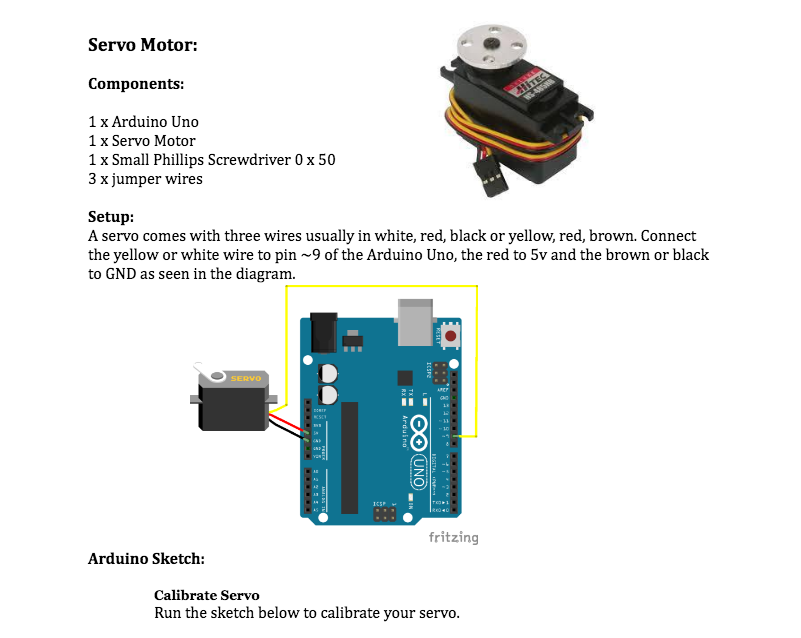
// set up the range finder, HC-SR04 int rangeTriggerPin = 2; int rangeEchoPin = 3; long currentDistance; // (cm) /** * initialization code, happens once **/ void setup() { // for printing Serial.begin( 9600 ); // set up the range finder pinMode(rangeTriggerPin, OUTPUT); pinMode(rangeEchoPin, INPUT); } /** * loops after setup **/ void loop() { // get current distance currentDistance = senseCurrentDistance(); // print it out Serial.println( currentDistance ); // wait a little before next iteration delay( 500 ); } /** * Use the range finder to determine distance to the * closest object. **/ long senseCurrentDistance() { // The PING is triggered by a HIGH pulse of 2 or more microseconds. // Give a short LOW pulse beforehand to ensure a clean HIGH pulse: digitalWrite(rangeTriggerPin, LOW); delayMicroseconds(2); digitalWrite(rangeTriggerPin, HIGH); delayMicroseconds(5); digitalWrite(rangeTriggerPin, LOW); // A different pin is used to read the signal from the PING: a HIGH // pulse whose duration is the time (in microseconds) from the sending // of the ping to the reception of its echo off of an object. long duration = pulseIn(rangeEchoPin, HIGH); return microsecondsToCentimeters( duration ); } /** * Determine the distance based on how long it took to echo back. **/ long microsecondsToCentimeters(long microseconds) { // The speed of sound is 340 m/s or 29 microseconds per centimeter. // The ping travels out and back, so to find the distance of the // object we take half of the distance travelled. return microseconds / 29 / 2; }Pressure Sensor//Adapted from the article: http://bildr.org/2012/11/force-sensitive-resistor-arduino int FSR_Pin = A0; //analog pin 0 void setup(){ // for printing Serial.begin(9600); } void loop(){ // capture the readings of the sensor int FSRReading = analogRead(FSR_Pin); // print the readings Serial.println(FSRReading); delay(250); //just here to slow down the output for easier reading }Flex Sensorint flexSensorPin = A0; //analog pin 0 void setup(){ Serial.begin(9600); } void loop(){ int flexSensorReading = analogRead(flexSensorPin); //Serial.println(flexSensorReading); //In my tests I was getting a reading on the arduino between 154, and 479. //Using map(), you can convert that to a larger range like 0-100. //To find your range uncomment the top serial print //comment out the one below and then bend your sensor in every direction // and see what minimum and maximum values you get and then use them below int flex0to100 = map(flexSensorReading, 154, 479, 0, 100); Serial.println(flex0to100); delay(250); //just here to slow down the output for easier reading }}Flex Sensor ContinuedServo MotorServo myServo; void setup() { myServo.attach(9); myServo.writeMicroseconds(1500); // Stop } void loop() { } Servo myServo; // Create Servo object to control the servo int stopValue = 1500; // this may differ depending on your motor void setup() { myServo.attach(9); // Servo is connected to digital pin 9 } void loop() { myServo.writeMicroseconds(1700); // Counter clockwise delay(2000); // Wait 2 seconds myServo.writeMicroseconds(1300); // Clockwise delay(2000); myServo.writeMicroseconds(stopValue); // Stop delay(2000); }